Setting up the Related Information for Opportunities
This section will describe how to use the various related information associated with the Accounts application.
We can see the information about Activities, Notes, Documents, Contact Role, Competitor, Relations on the Opportunity Summary Screen as well.

Notes
In Opportunities, click on the ![]() icon of an opportunity and click Notes.
icon of an opportunity and click Notes.
In this section, we can see the notes already created.
To create new notes, click on New Note .
See more details about new notes.
Activities
Activities consist of Call log, Tasks and Events information.
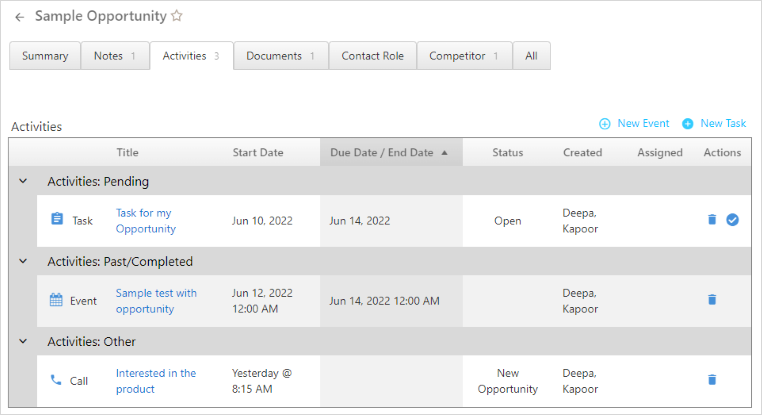
Within Opportunity > Activities you can create new tasks and new events.
Find more information on Call log.
Tasks
To create a New Task:
- In Opportunities, click on the
 icon of an opportunity to add new tasks.
 - Click Activities > New Task.
- Fill in the necessary details like the subject for a task, status, duration dates, ownership of a task, etc. and click Save.
- Learn more details, on how to create tasks.
Events
Events help us to create and manage appointments.
To create a New Event:
- In Opportunities, click on the
 icon of an opportunity to add new events.
 - Click Activities > New Event.
- Enter the details like Event type, name, and the start and end time of the event. You can also add attendees (attendees can be from your organization or the external users) as well as set reminders, select the time zone, etc.
- After finishing, click Save.
- The process of creating events in Opportunities is similar to creating events in Contacts. See more details, on how to create events.
Documents
Relevant Documents can be attached to an opportunity, allowing to access important information from one place easily.
In Opportunities, click on the ![]() icon of an opportunity and click Documents to
upload files, create shortcuts and create a web link.
icon of an opportunity and click Documents to
upload files, create shortcuts and create a web link.
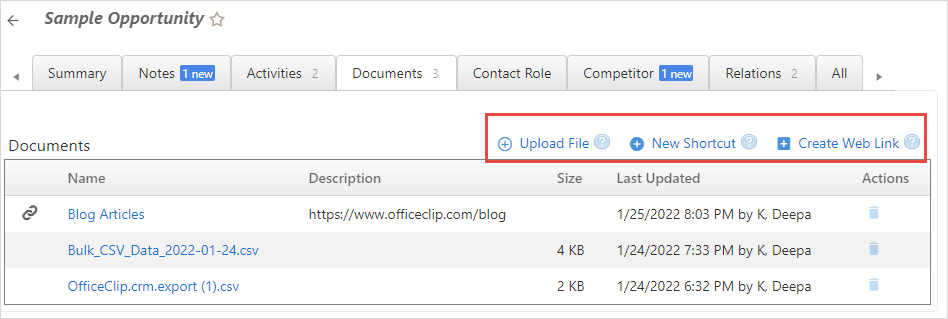
Upload File
These files can be uploaded from the local disk and will stay with an Opportunity. These files are removed when the opportunity is deleted.
- To upload a file, click on the Select button.
- You can drag and drop a file from your windows explorer
application or choose the file from the desired location.
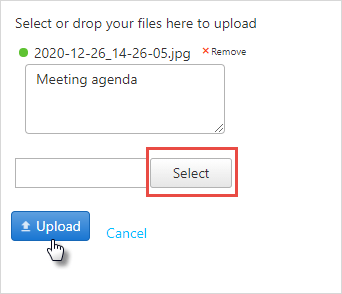
- You can upload more than one files. Once done, click Upload to add documents to your opportunity.
New Shortcut
This feature allows to create a link from the OfficeClip Document Management application and helps keep common documents for all opportunities in one place.
To create a Shortcut, click New Shortcut .
- You can see all the folders and files from the OfficeClip Document Manager.
- Select a file or a folder and click Create Shortcut
.
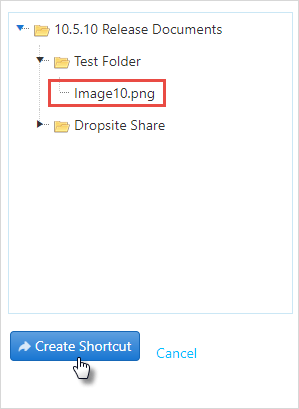
A new shortcut will appear on the document widget.
Web Documents
Web documents are URL links to the documents in the web. The user can store relevant web links with the opportunities.
- To create a Web Link, click New Web Document .
- Copy and paste a public URL here. This URL could be from Dropbox, Evernote, Google Drive or any other public document.
- Give a name to the document and click Create Web
Link .
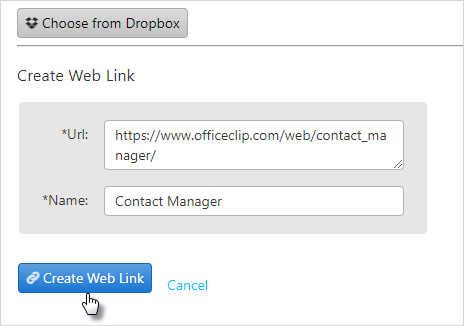
- The web link will show up in the document widget.
Contact Roles
Contact roles will allow you to associate multiple contacts with each opportunity and to give those contacts a particular role in the opportunity, such as Manager or Associate. Associating contact roles with your opportunities will help you to manage better your opportunities and those working on them.
To create roles for an Opportunity:
- Click CRM > Opportunities > Admin > Contact Roles.
- To create a new role, click Add Contact
Role.
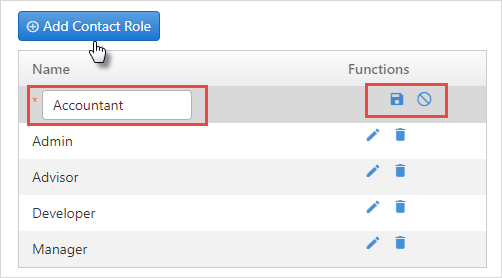
- Type the name of the role you want to create and then click on the
 icon
icon
To use these created roles:
- In the opportunity list, double-click the opportunity for which you want to assign a contact a role.
- Then on the summary screen, click Contact Role
> New Contact Role.

- From the drop-down list, select the role you want to assign and
click
 icon. The search icon will give a list of Contacts from which you can
choose who will have that Contact Role for that opportunity.
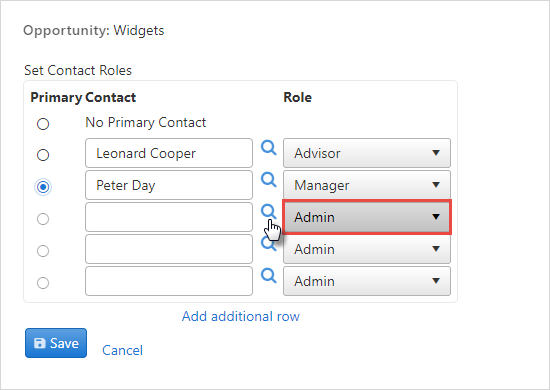
- If you want a Primary Contact for the opportunity, just click the radio button beside that person.
- Click Save when finished.
To view the roles assigned to a particular opportunity:
- Double-click on the opportunity you want to view a list for.
- On the summary page, click Contact Role .

- You will see the list of roles assigned to that particular opportunity.
- To edit a contact role click the
 icon.
icon. - To delete a contact role click the
 icon.
icon.
Competitor
The OfficeClip Competitor module allows companies to store and track information regarding their competitors. Store the competitor information with each opportunity. Knowing which competitor won a particular opportunity helps in making changes to the sales tactics to win future opportunities.
On the summary page, you can view the list of competitors.

You can either add a new competitor to the opportunity list or select an existing competitor.
To add a new competitor:
- Double-click the opportunity for which you want to add a competitor.
- On the summary page, click Competitor >
New Competitor .
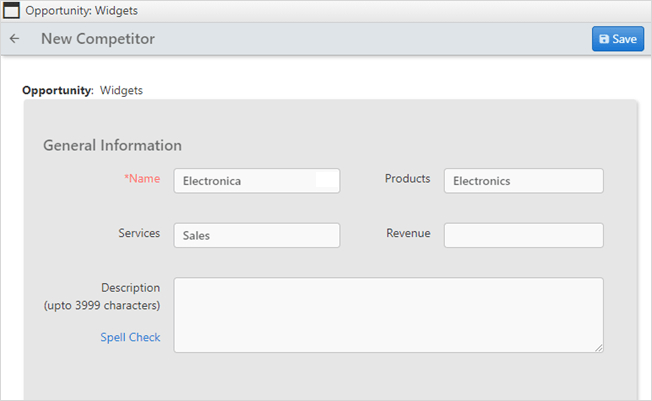
- Then fill up the details of the competitors like their general information, address information, their strength, weakness, opportunities, and threats, and then click Save.
To add an existing competitor to your list:
- Click Add Existing Competitor
- From the drop-down list, select the competitor and click
Add.

- To edit the competitor information click the
 icon.
icon.
