Sharing Documents
The Documents module allows you to share documents with Customer Portal users, who have limited access to OfficeClip. From this screen you can control only shared Documents Items, making it easy to manage and make changes.
View Share
To view and make changes to the Shared documents:
- Click the Shared Documents button on the
button bar.
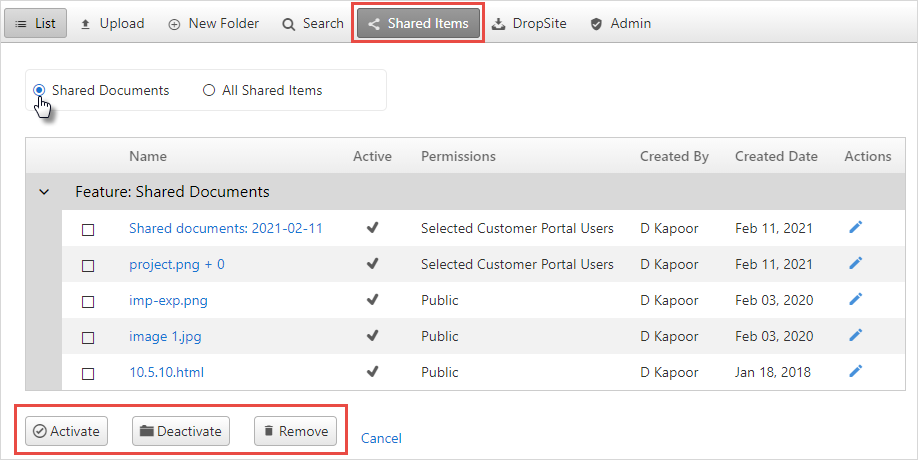
- You can now see all documents currently shared.
- If you want to stop sharing the documents with the users, select the documents by clicking on the checkbox, and click Deactivate. If you want to share those documents again, click Activate.
- To remove or delete the share, select the documents and click on the Remove button.
- To make changes to the shared items, like adding password,
expiration date or changing the share options click on the
 icon in the Actions column.
Create Share
To share documents or folders with other users:
- Select the document or the folder to be shared by check-marking
it, then click on the
 share button.
- Give a share name and select whether you want to make a public
link (
web link) orsecured link. - If a web link is selected, you can also send your documents
password protected and with an expiration date. This feature will make
it easier to send documents to your customers via email.
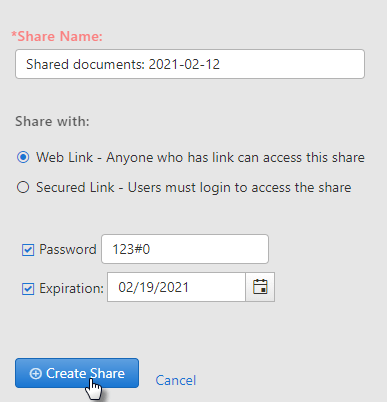
- Click on Create Share.
- If a secured link is selected, select the user from the dropdown,
enter the password and the expiration date for the document.
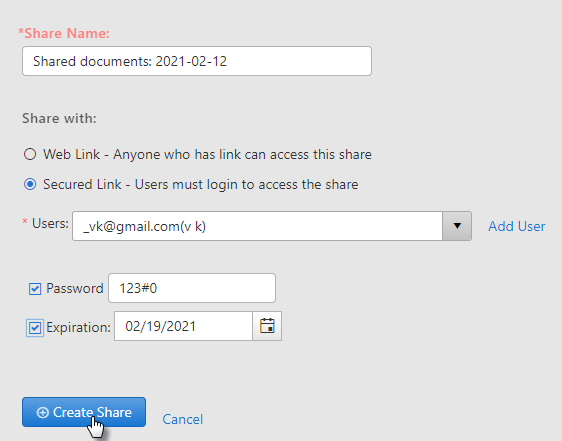
- You also add a new user with whom you want to share the documents.
Click on Add User link next to the Users.
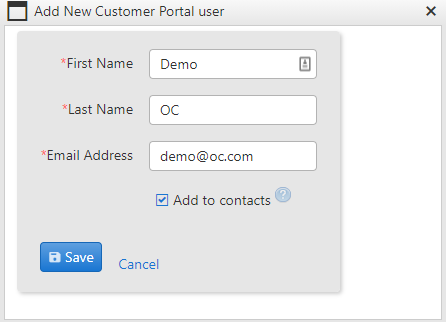
- Enter the required details and click Save.
- After selecting the user, click on Create Share
- You can see the URL for the share. You can copy this URL by
clicking
Copy URLand send it to other users via email.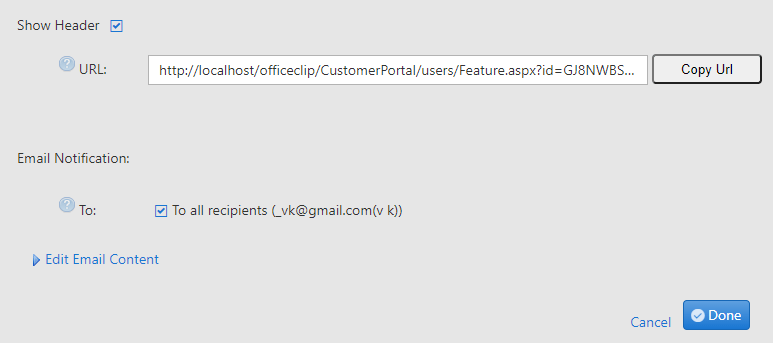
- If it is a
Web Linkthen the users can copy and paste the link in a browser and view the documents. But if it is aSecured Linkwhen the users copy and paste the link in the browser, they will have to enter login and password to access the documents. - If you want to let others know about this share, checkmark the email address. If the outgoing email needs modification, click on the Edit Email Content link to personalize the email.
Finally, click on the Done button.