Presentation
This section contains links that allow modification of the look and feel of the entire site.
Header
Note: This feature is only available in the Enterprise Edition of OfficeClip.
The Site Header Setup feature allows the Site Manager to place the company's header on all the OfficeClip screens, replacing the OfficeClip header.
To set up the header:
- Click Settings > Entire
Site > Presentation >
Header.
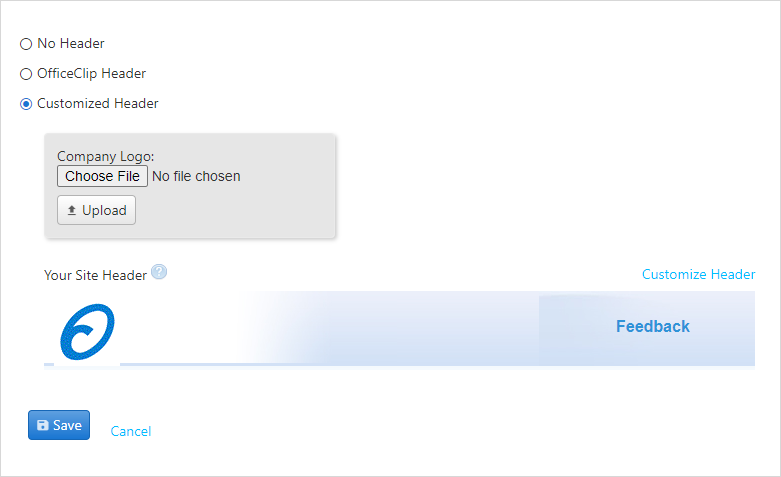
- If you do not want any header, choose the
No
        Header
option. - You can choose the
OfficeClip Headerby clicking on the radio button. - To set up a
Customized Headerwith your company logo, choose theCustomized Headeroption. - There are two ways to set up customized header:
- You can upload a logo: To upload a logo click on the Choose File button, choose a file that is on your computer and click on the Upload button.
- The second way to set up the header is click on the
Customize Header option. A pop-up will
open.
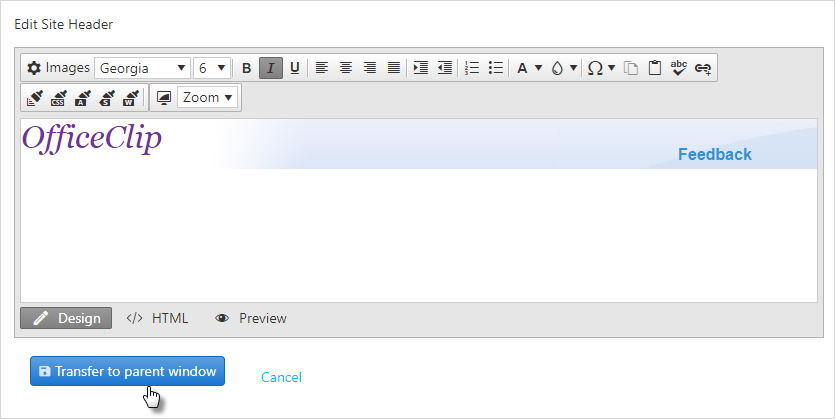
- Add desired image or add and edit text as per your requirement.
- After adding, click on the Transfer to parent window button.
- Finally click Save and refresh the screen to view the new header.
If there are images embedded in the HTML code you are using, those images should be hosted on an external site, and then the image URL should be put into the HTML code.
Login Screen
Note: This feature is only available in the Enterprise Edition of OfficeClip
The login screen in OfficeClip can be formatted with an HTML header to personalize it with your company's information, logo, etc.
The Site Manager can change not only the header but can also put an HTML message box on the right-hand side area of the screen for the users.
The message box area could be used for information about the site. For example, use the message box to let users know when the site will be undergoing maintenance, such as backups and other housekeeping.
To access the Login Screen Setup:
- Click Settings > Entire
Site > Presentation >
Login Screen
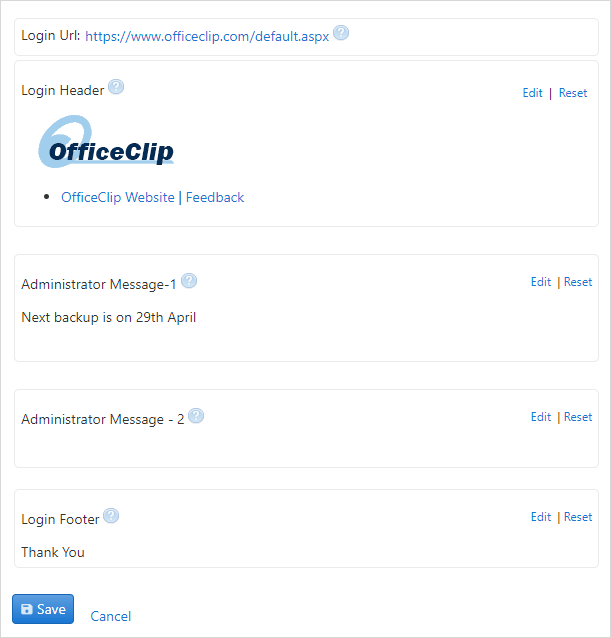
- There are four sections on the screen:
Login Header,Administrator Message-1,Administrator Message-2,Administrator Message-3andLogin Footer. - To change each section do the following:
- Click on the Edit link at the bottom of the respective section.
- On the WYSIWYG editor that comes up, you can either select a
template or if you have HTML code, you can click on the
HTML tag at the bottom and paste the
code.
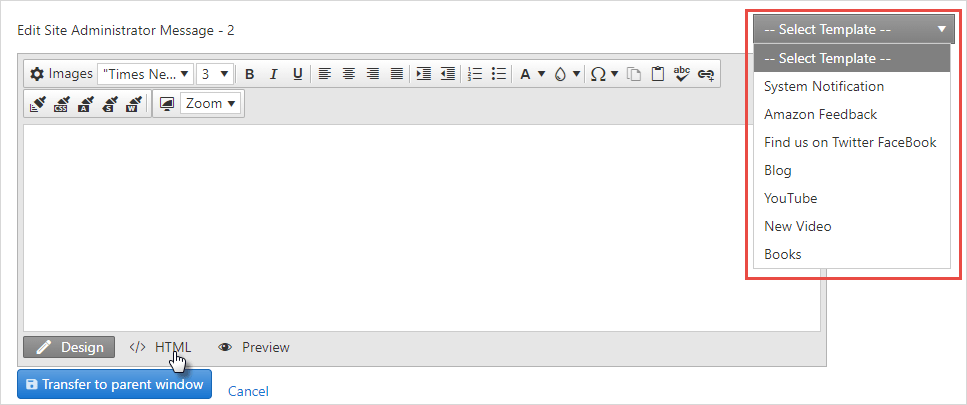
- After finishing, click Transfer to parent window.
- Again, click on Save on the
Login
        Screen Setup
. - To reset the section to the default value click on the Reset button at the bottom of the section.
Email Templates
This feature gives the Site Manager control to create templates for messages that are sent out from OfficeClip. If a calendar event is updated, for example, the template will enable an email to be sent to all users associated with the particular event.
There are many templates already available in OfficeClip. The Site Manager can change the look and feel of any of the templates that are currently on the site. HTML code can be used to write a new template or to change an existing template. An HTML editor is provided with OfficeClip for this purpose.
In the email template, you can select entities and attributes, which can be copied to the body of the template text. The entities and attributes are replaced with the actual information when the emails are sent out.
To edit email templates:
- Click Settings > Entire
Site > Presentation >
Email Templates
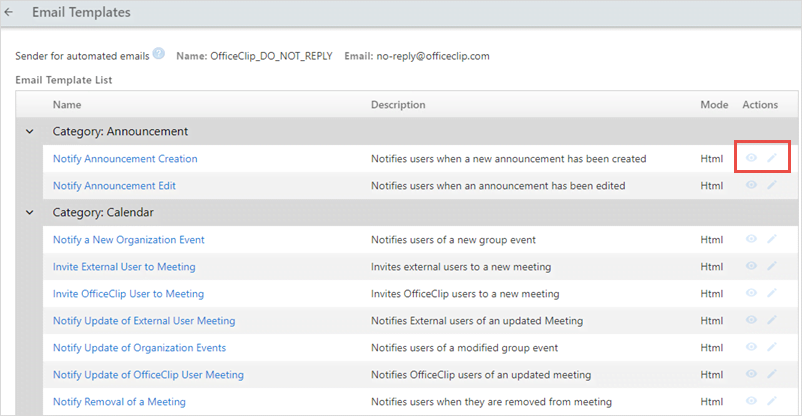
- An array of templates is available. From here, just select the
desired template. To preview a template, click on the
 icon.
icon. - You may modify the template description, letterhead, and mode. To
modify, click on the template that you want to modify or click on the
 icon in Actions column.
 - Click Save when complete. The newly revised template will be saved on the main template screen.