WebForms
This screen allows you to create a web form that can be placed on your website to allow your visitors to submit issues. Also, it allows you to create a password for your partners so that they can report an issue and track the status of the issue. It is a simple one-click interface for sharing public and private shares.
To use the web forms:
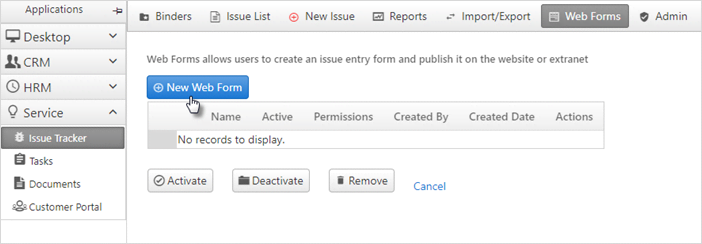
- Click Services > Issue Tracker.
- From the binder list, click on the binder that you want to use to create the web form.
- Click on Web Forms from the top menu and then
click New Web Form.
- Give a share name and select whether you want to make a
Web
      Link
or aSecured Link.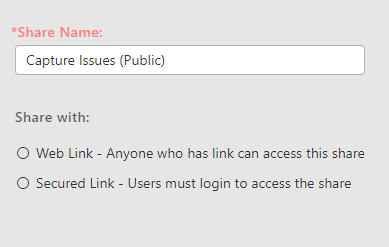
Web link: is a public share, which can be accessible to everyone and required no password.Secured link: is a secured shared, where users will be able to access this link only after entering the login and password.
Secured Link
Secured Link allows password-protected access for the customer portal users. It also means that the customer portal user needs to be created in the system (along with their initial password) before sending them the link.
To learn more details about creating users in the customer portal, click here.
- If the secured link is selected, you can select the user from the
drop-down list to share the document or issues.
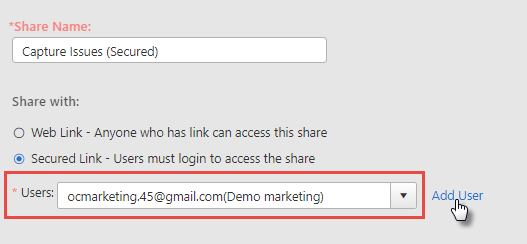
- To Add New User for sharing documents or
issues, click Add User. Add the name and email
address. Click on
Add to contactscheckbox, to add the name to your contacts database.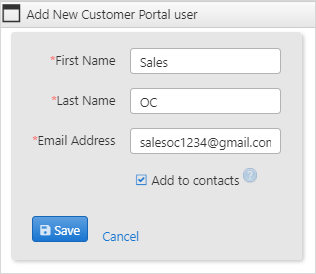
- Select the fields to be shown on the web form. Click Ctrl and
select fields and click the
 icon
to add the fields in the used fields section. Note that the
description will always be visible. Check-mark the required box next
to each field if the user must fill in this field before
submission.
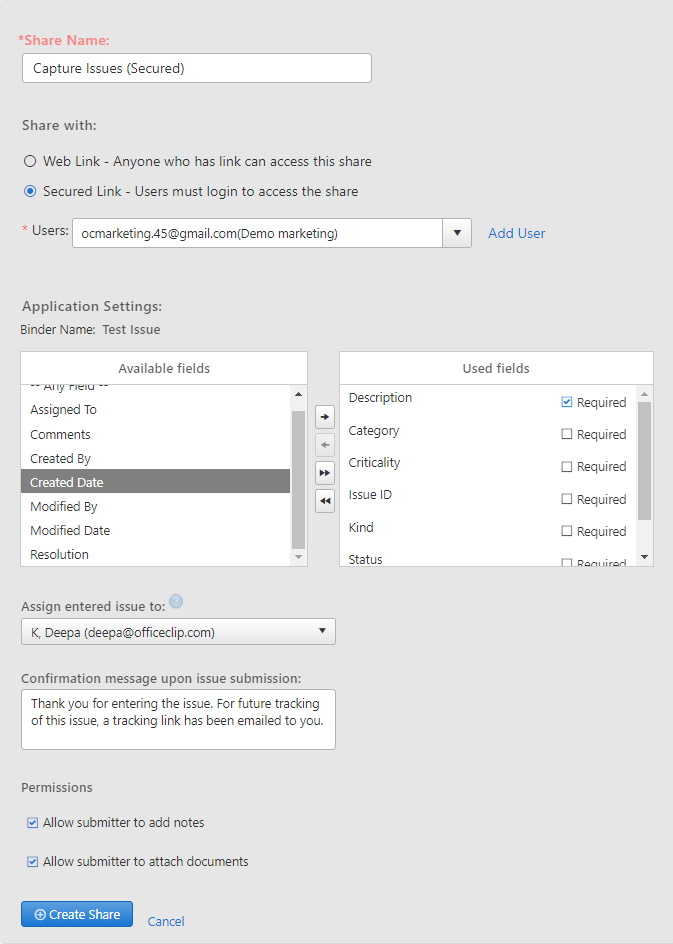
- Select the user to whom the issue must be assigned.
- Add a confirmation message that will show to the user upon submission.
- Select whether the issue submitter can attach documents or notes to the issue.
- Click on Create Share.
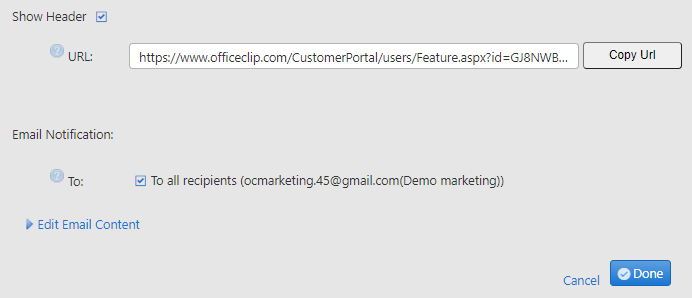
- The URL for the share is shown. Click on the Copy URL link to access this URL.
- If you want to let the users know about this share, checkmark
their email address. If the outgoing email needs modification, click
on the Edit Email Content link to personalize
the email.
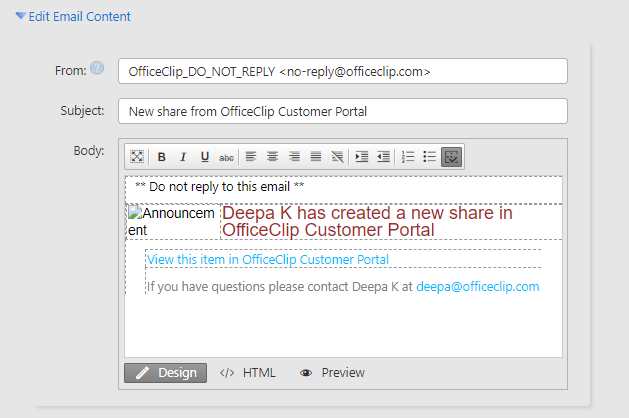
- Finally, click on the Done button.
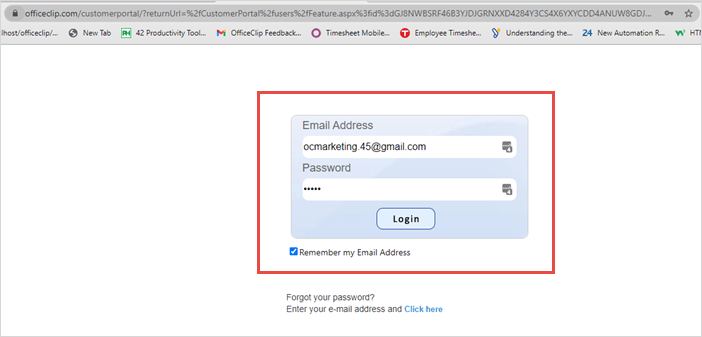
- The customer portal user when receives this URL can copy and paste
it in the browser, where the user will be asked to enter the email
address and the password.(When a customer portal user is created in
the system, password is generated automatically or it can also be
generated manually.)
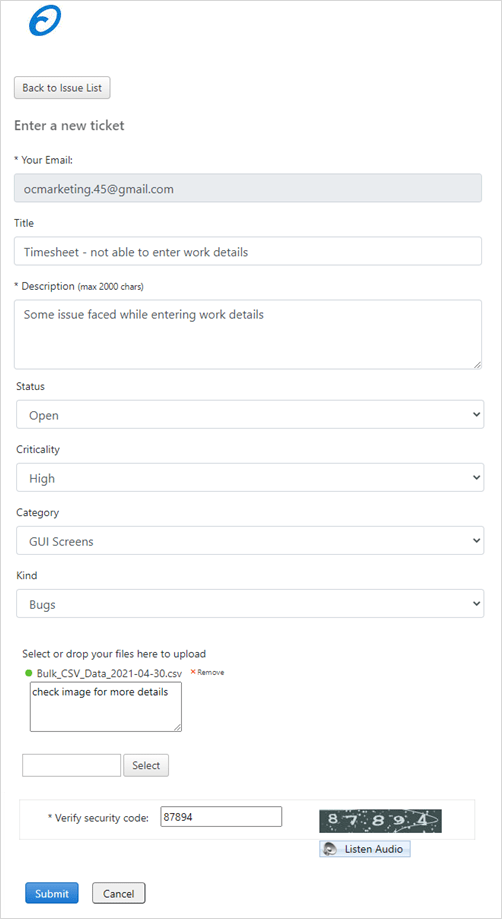
- The user will see the generated form and he/she can enter the
issue which will automatically be submitted in the issue list in the
respective binder.
Web Link
To use Web Link:
- Click Web Form > New Web Form.
- Click Web Link.
- Select the fields to be shown on the web form. Click Ctrl and
select fields and click the
 icon
to add the fields in the used fields section. Note that description
will always be visible. Check-mark the required box next to each field
if the user must fill in this field before submission.
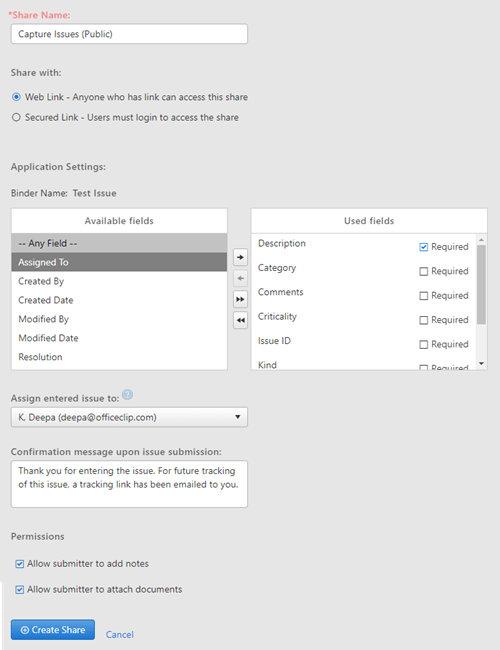
- Select the user to whom the issue must be assigned.
- Add a confirmation message that will show to the user upon submission.
- Select whether the issue submitter can attach documents or notes to the issue.
- Click on Create Share.
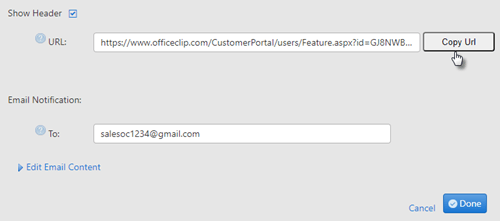
- You can see the URL address where you can enter the issues. Copy
the URL address and paste it in the browser or you can email it to the
users.
- Enter your name, email address, title and description,status,
criticality related to the issues. Click
Submit.
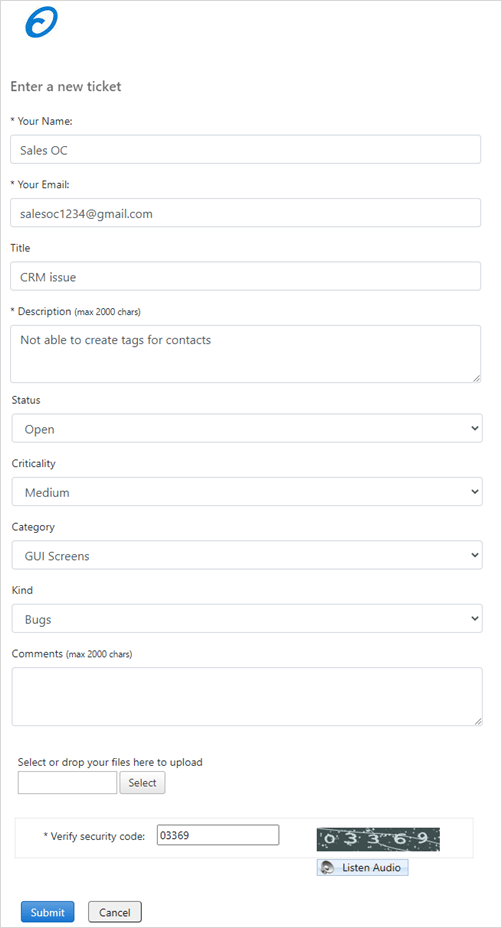
- After clicking the submit button, you will receive an email regarding the issues. You can also post a reply to the issue through your email. Click on the Click here to post a reply to this issue link.
- It will take you to the portal and click on Reply to add your reply.
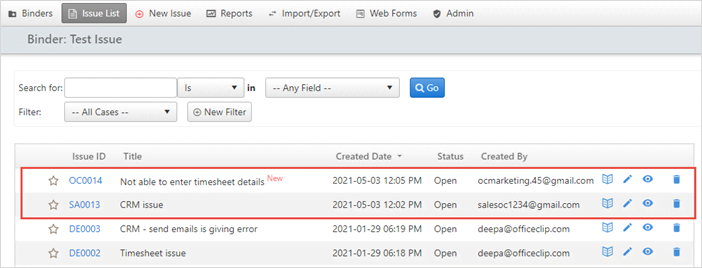
- You can also see the issues in the issue list. Here, you can track
the progress, and edit, delete or track time for that particular
issue.
